Manage PIDs
One of the main functionalities of the Metaresolver is the Management of the different PIDs / Providers.
List of Providers
By the time the user logs in he can see the list of entries he owns. The list of entries he has added to the service.
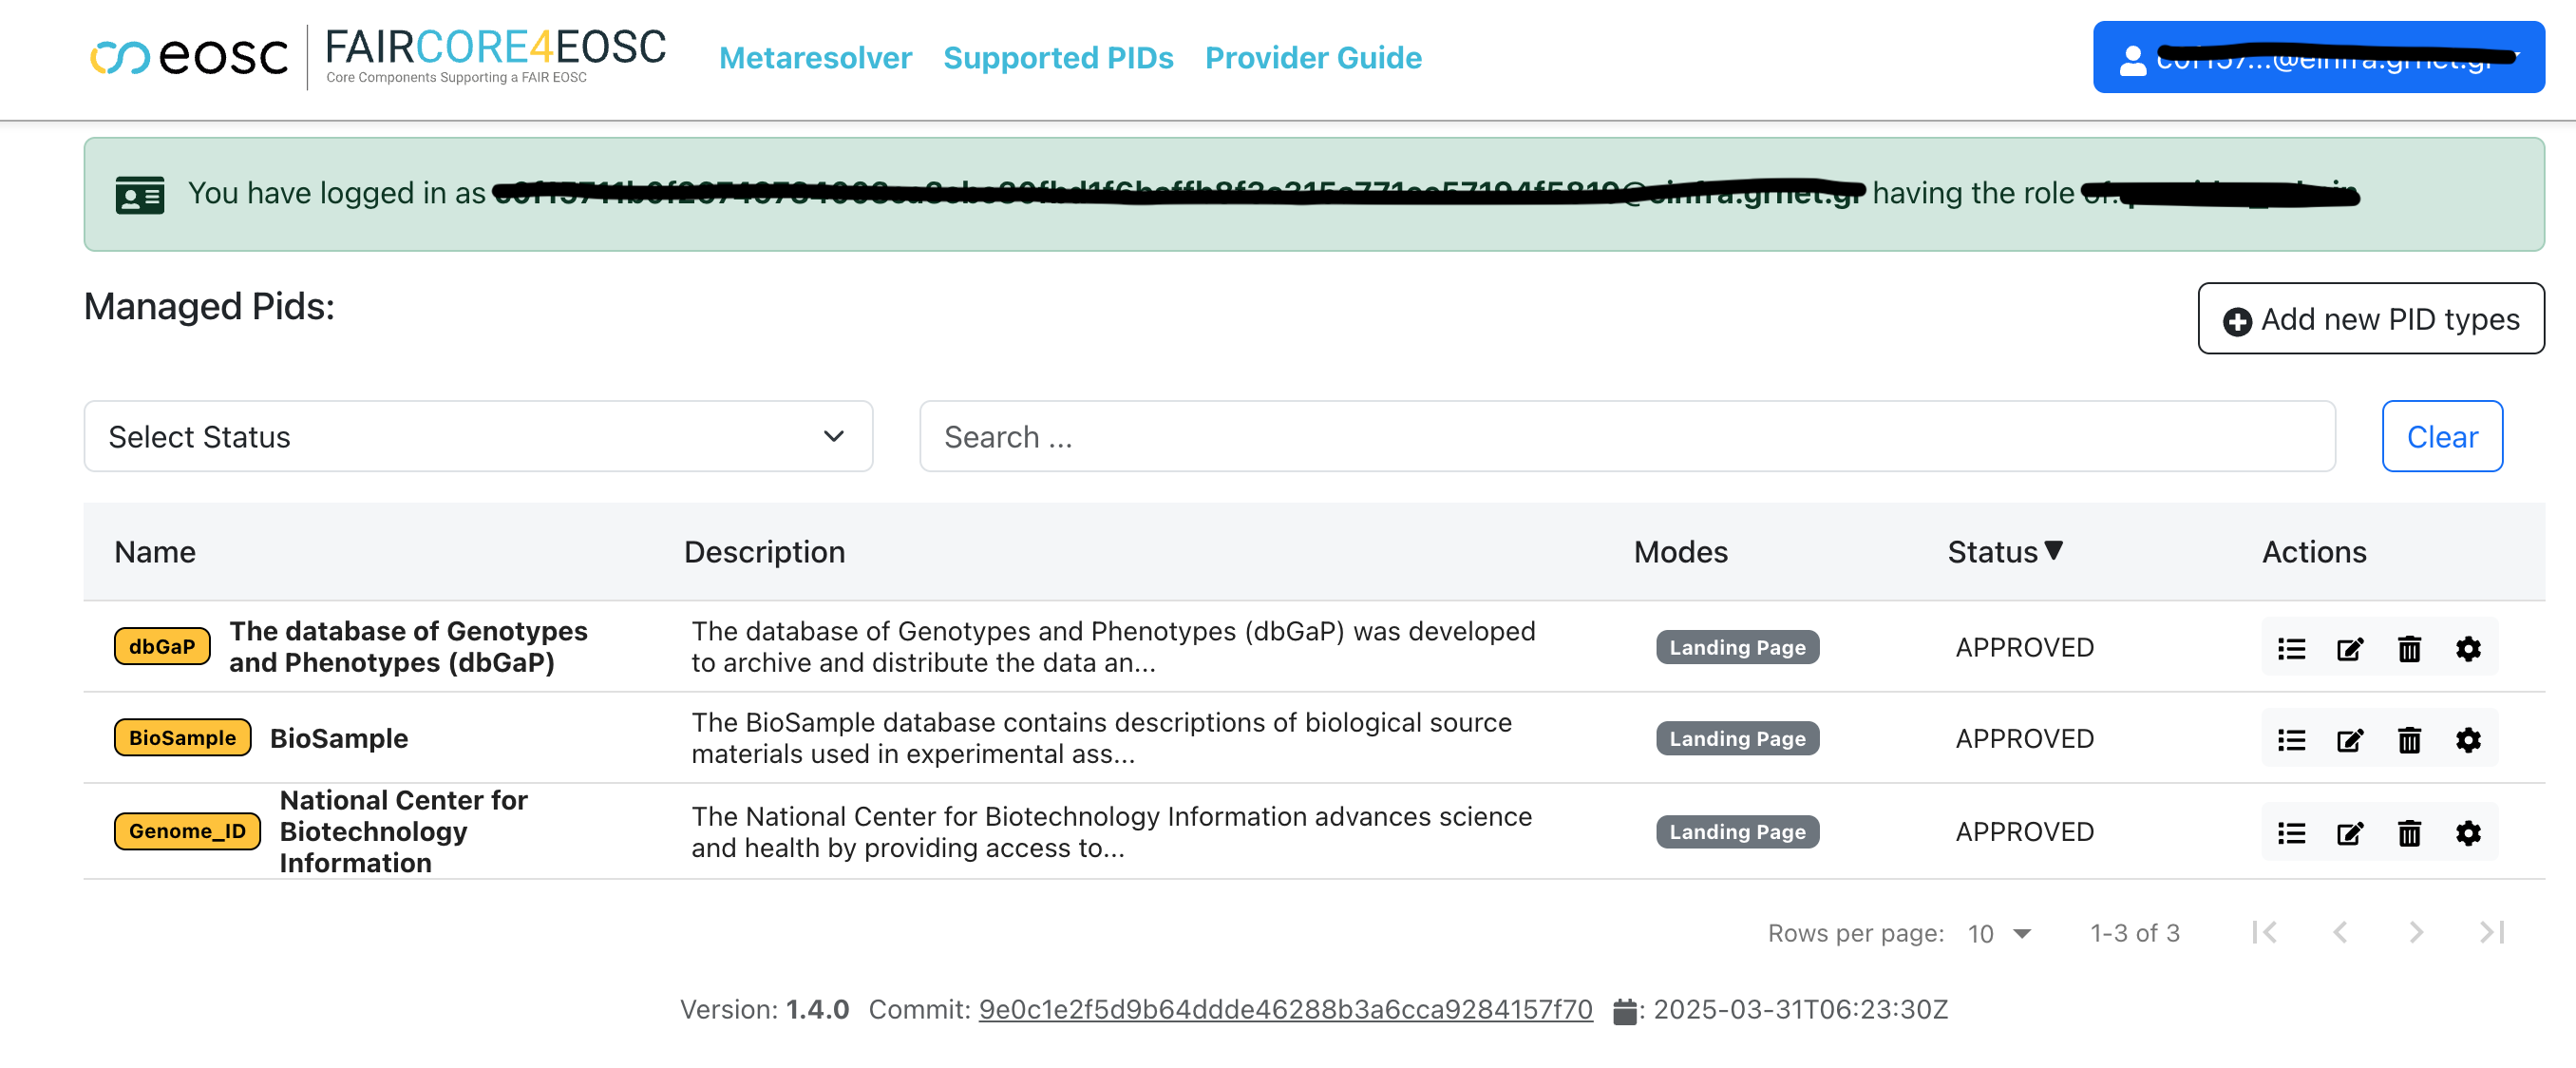
The displayed information includes:
- Name: The name of the PID.
- Description: The description of the PID type.
- Modes: The three different modes he supports (resource, metadata, landing page).
- Status: The status of the entry if it is pending (checked by admins) or Published.
- Actions: The list of actions that the user can perform.
Search
Users can search for PIDs by entering keywords in the search auto-complete field. The search function is performed across the fields that describe the PID type.
At the same time the user can filter the list of entries by selecting one of the 2 status (Pending, Approved).

Add new
To add a new entry the user should click the Add new PID types button on the top right.
The user should fill in the following details
- Name: The name of the PID.
- Description: The description of the PID.
- Regexes The Regexes used for identification. These can be multiple
- Modes: The three different modes he supports (resource, metadata, landing page).
- For each mode (if supported) the user can add the resolution URL and a name to describe this resolution URL. Bare in mind that for each mode multiple resolver can be accepted.
- DOI related: The user should select if the specific PID relies on DOI's
- PID Examples: The user can add multiple examples to help the user understand the use of the entry
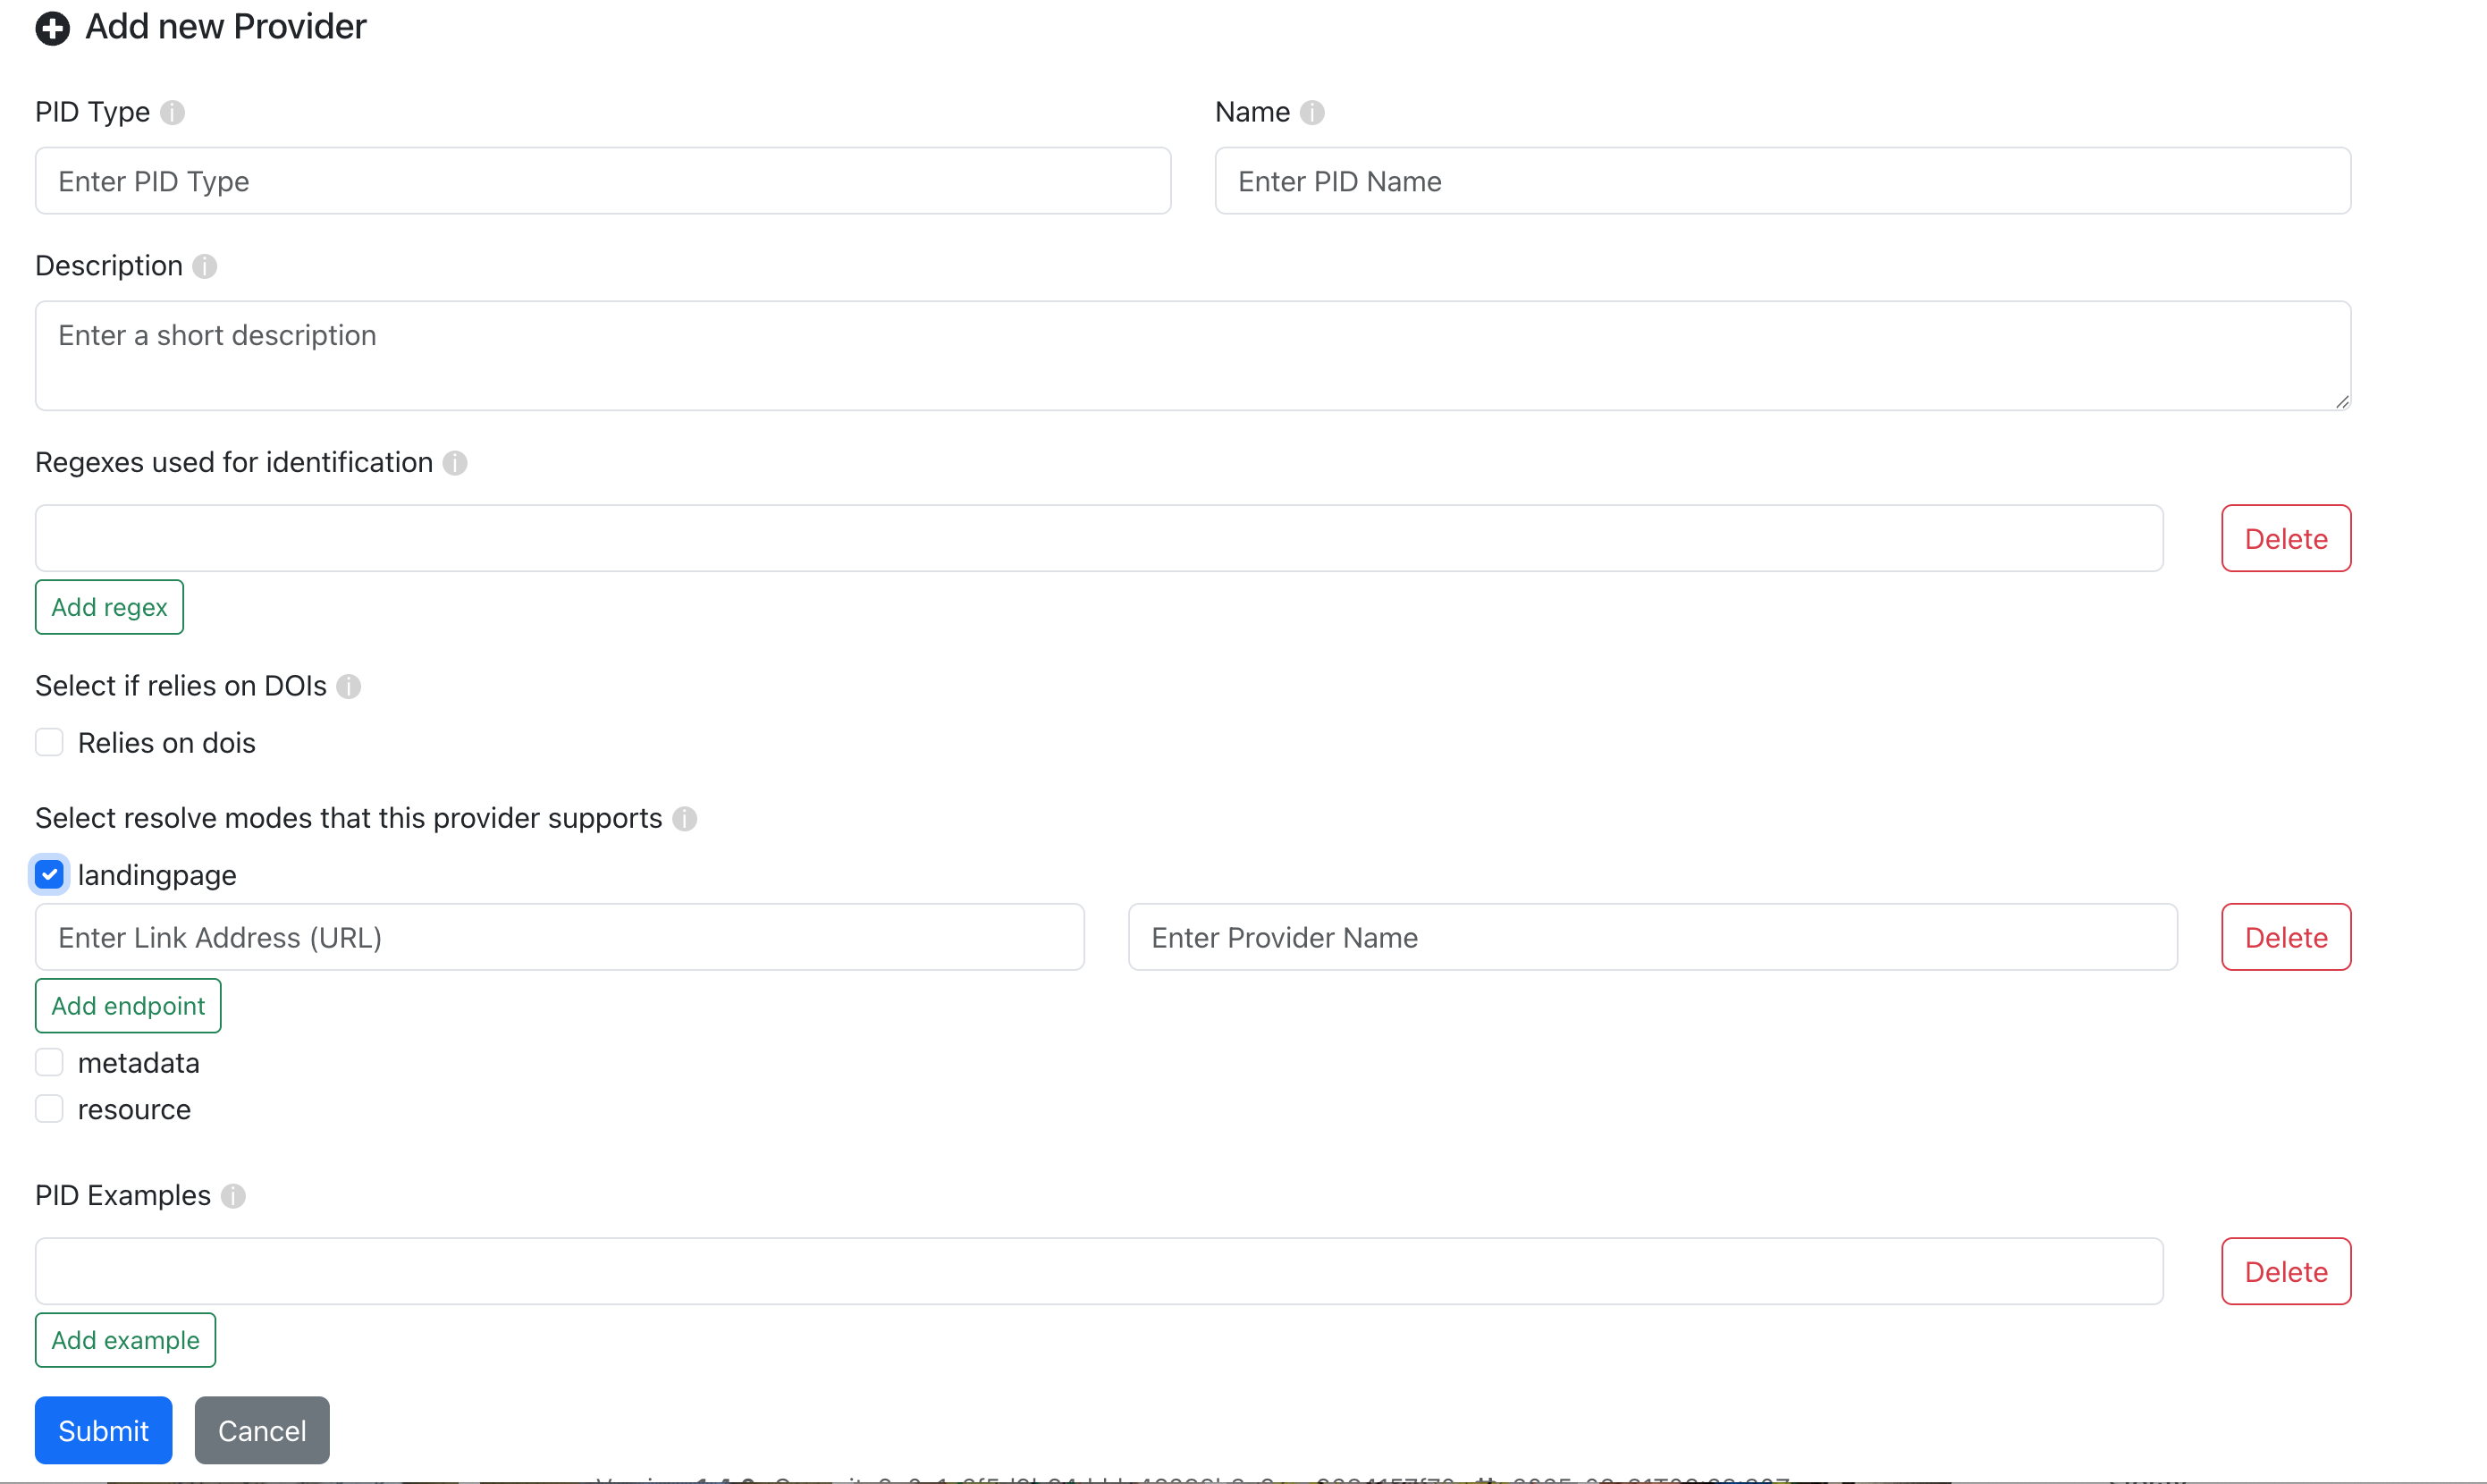
To proceed with the addition, the user should click the Submit button. To cancel the addition, click the Cancel button: Cancel Button.
By the time the User click the Submit button the entry is in Pending mode, waiting for approval from admins.
Update
To edit the Provide, the user should click the Edit button in the actions column. Then a page will appear with all the filled in details as shown in the image below. The user may update the value he wants.
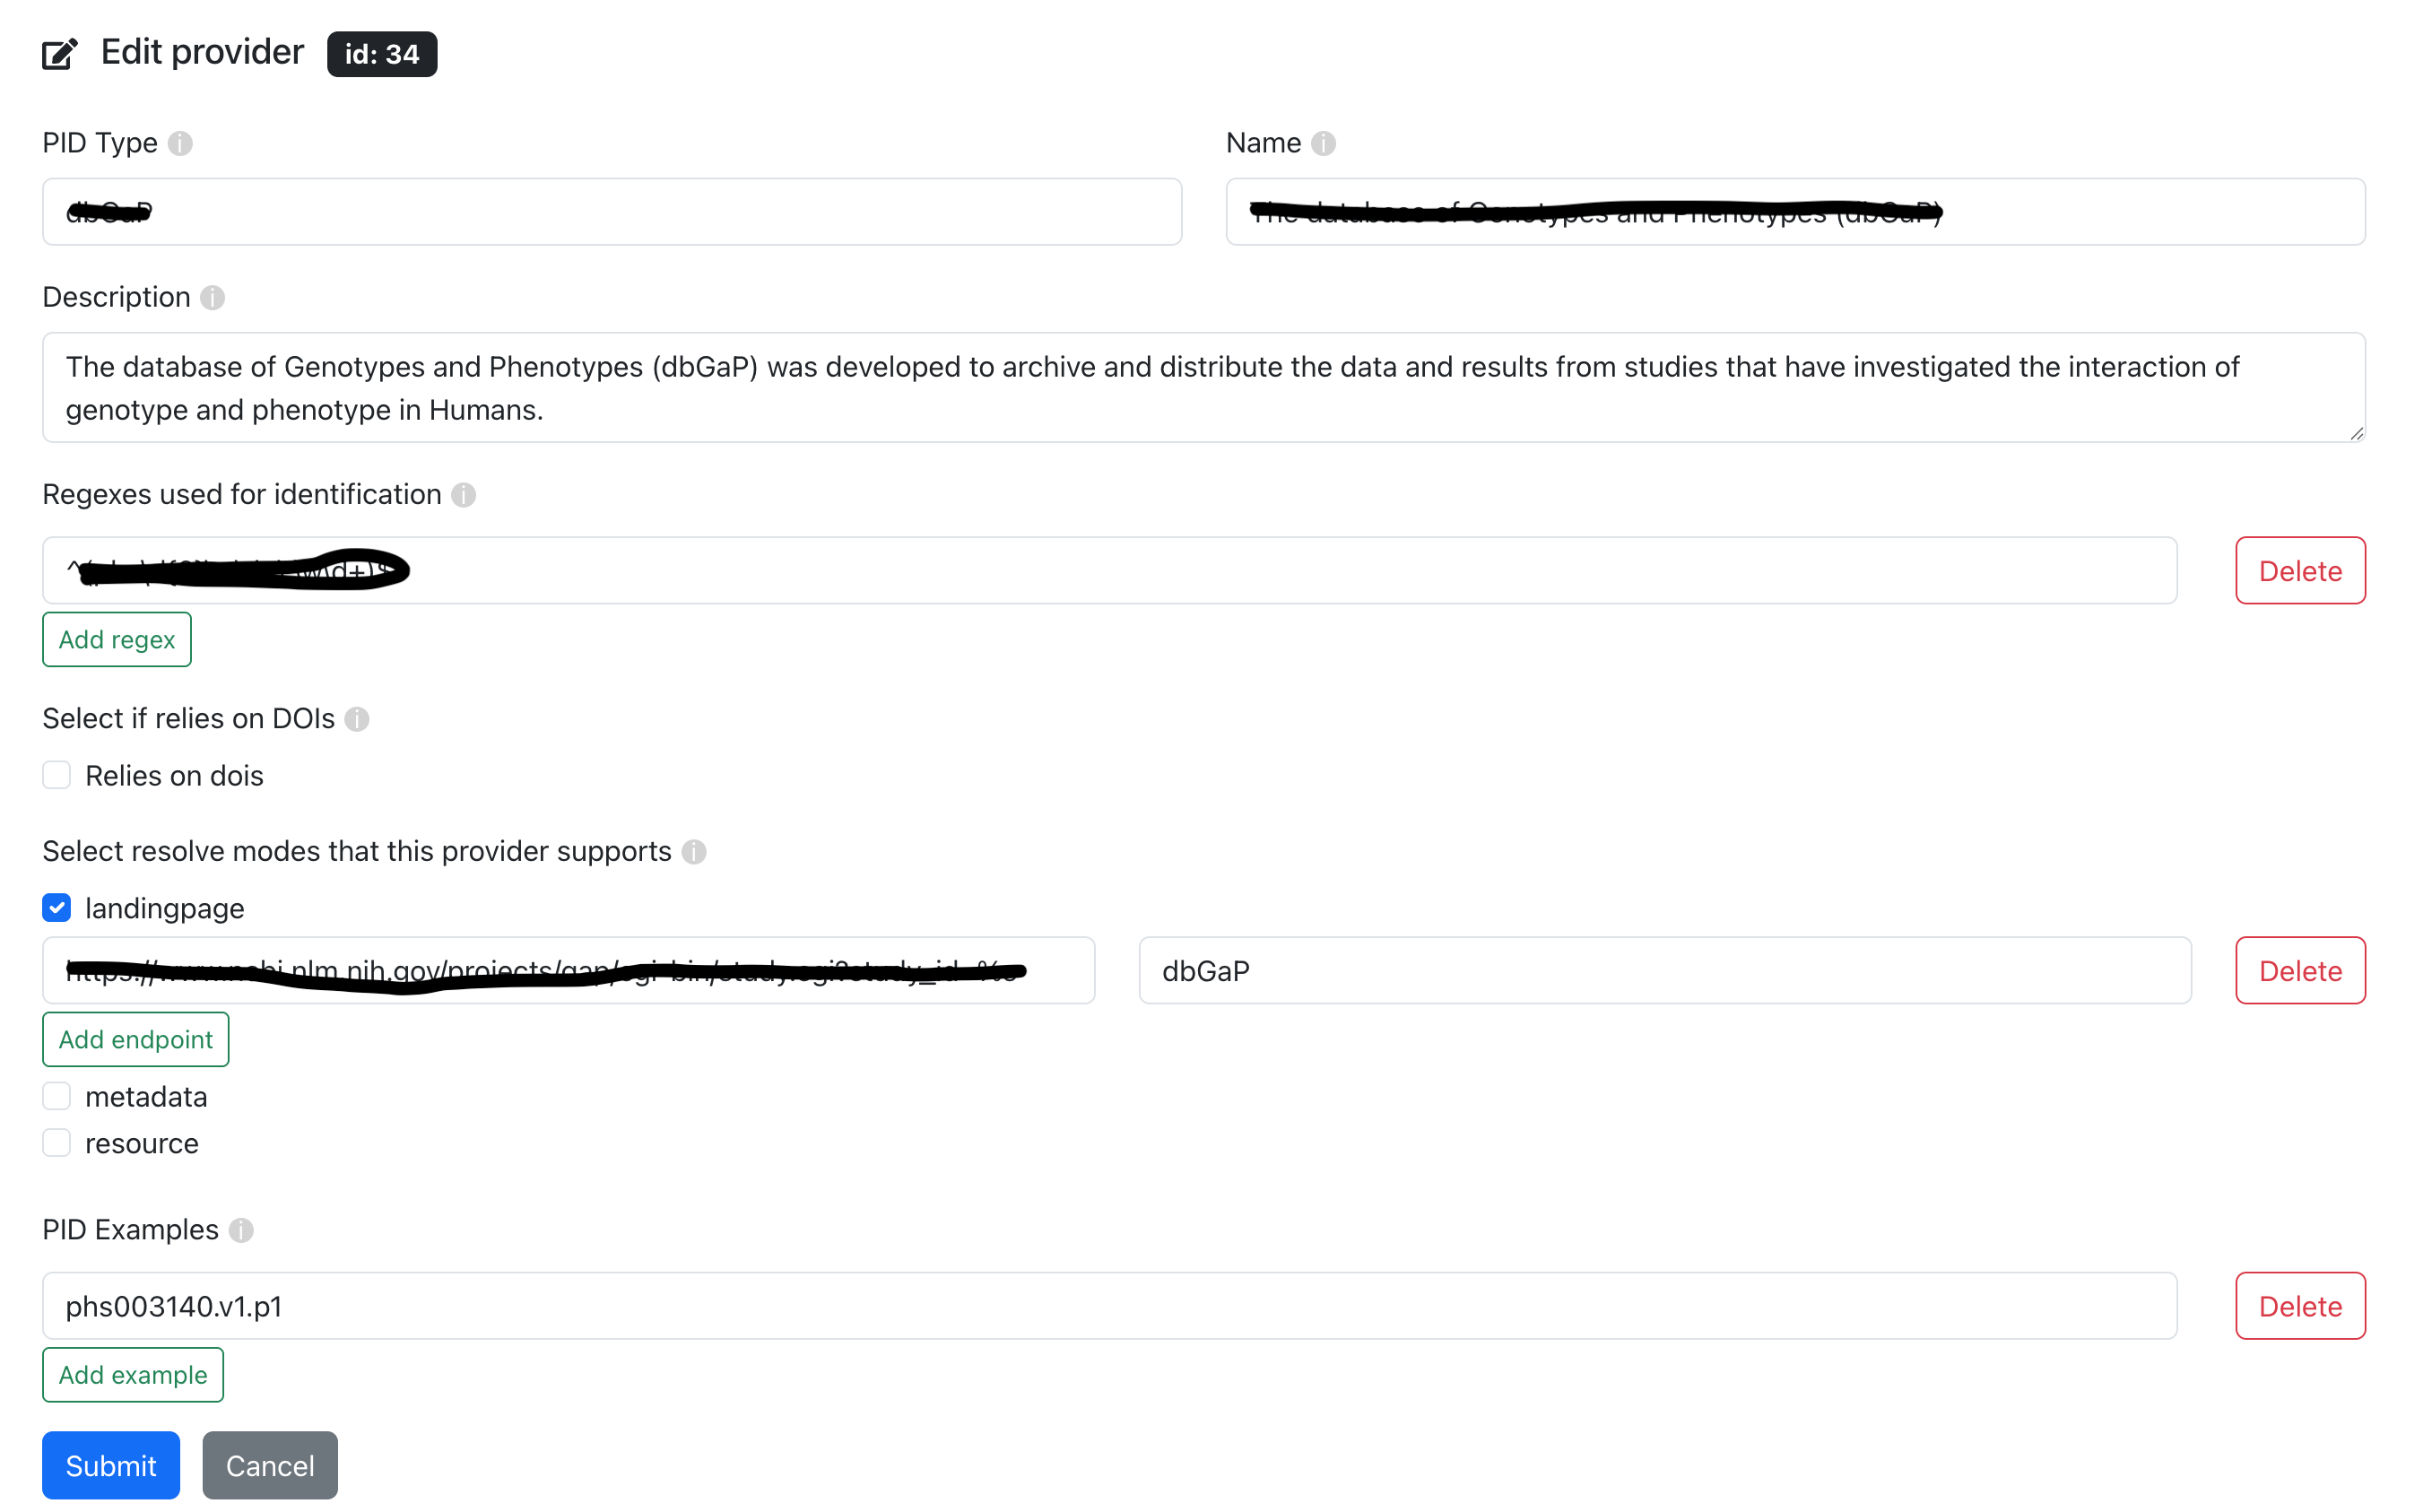
To save the changes, the user should click the Update button. To cancel the changes, the user should click the Cancel button. By the time a change happens the status of the entry moves to Pending.
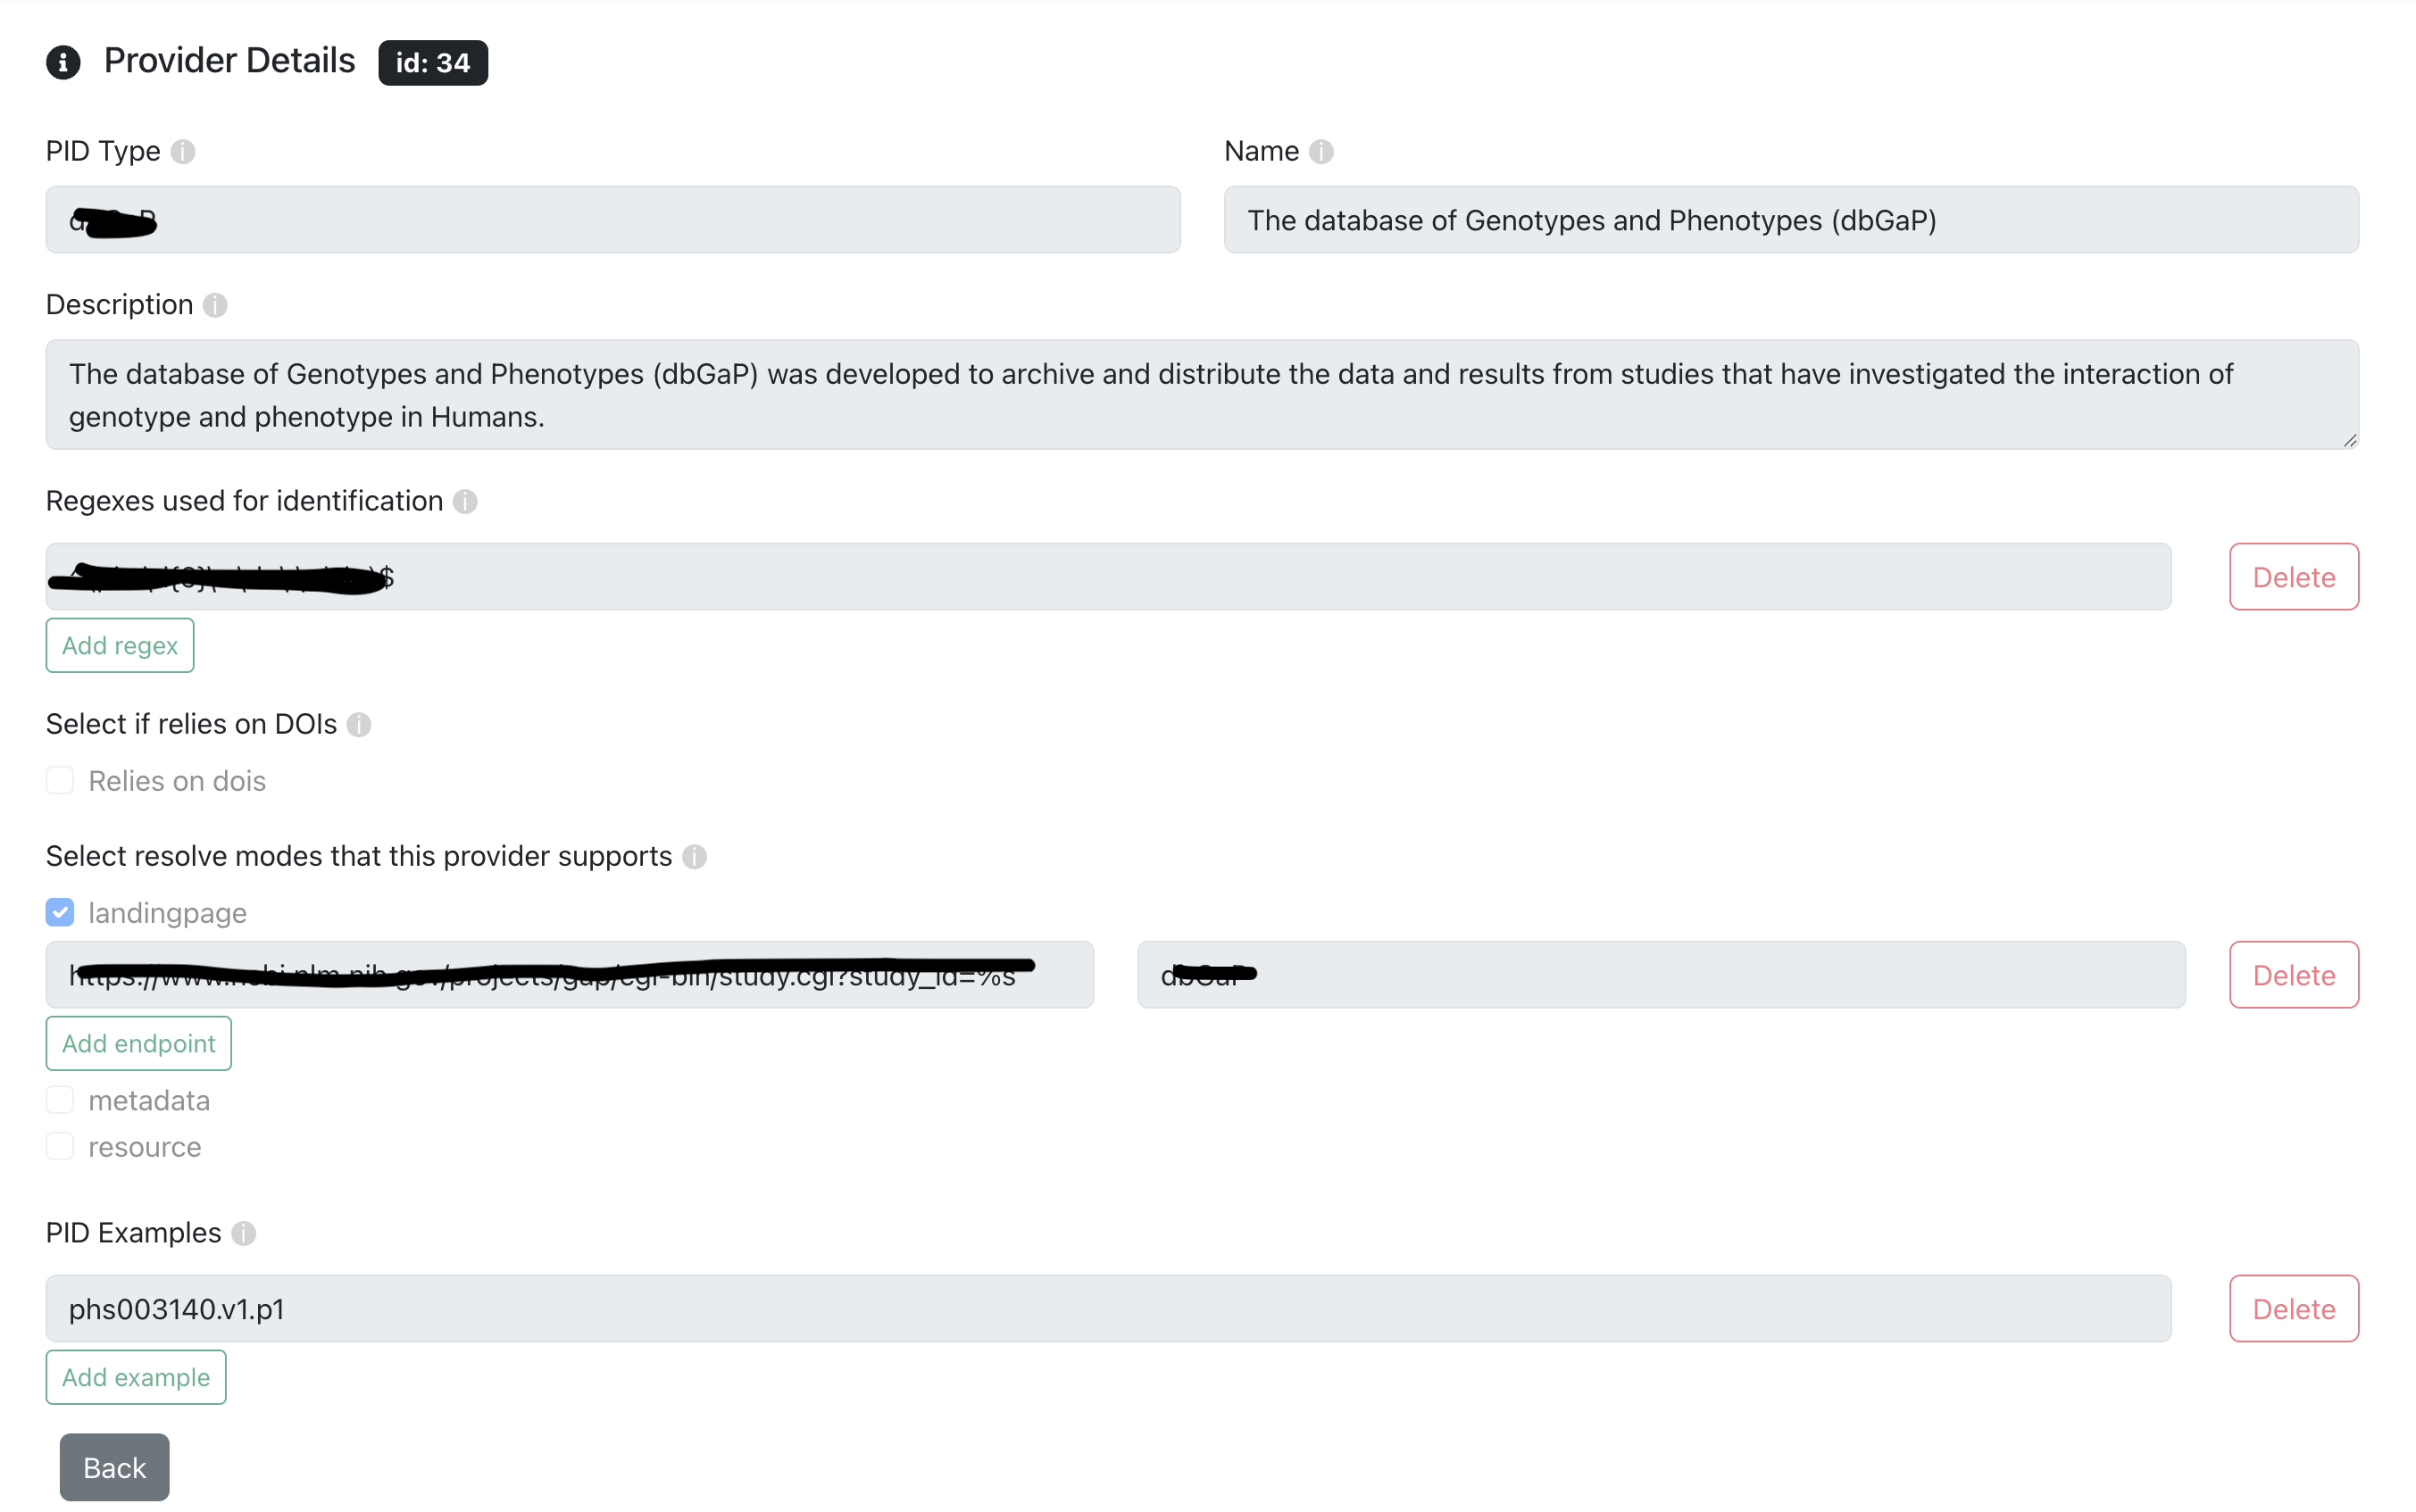
View
To view the details of a specific entry, click the Details button: View Details Button. A new page will display the entries detailed information.
Delete
A User can delete one of the entries he owns by clicking on the Delete button. Then a modal like the one in the following image will appear.
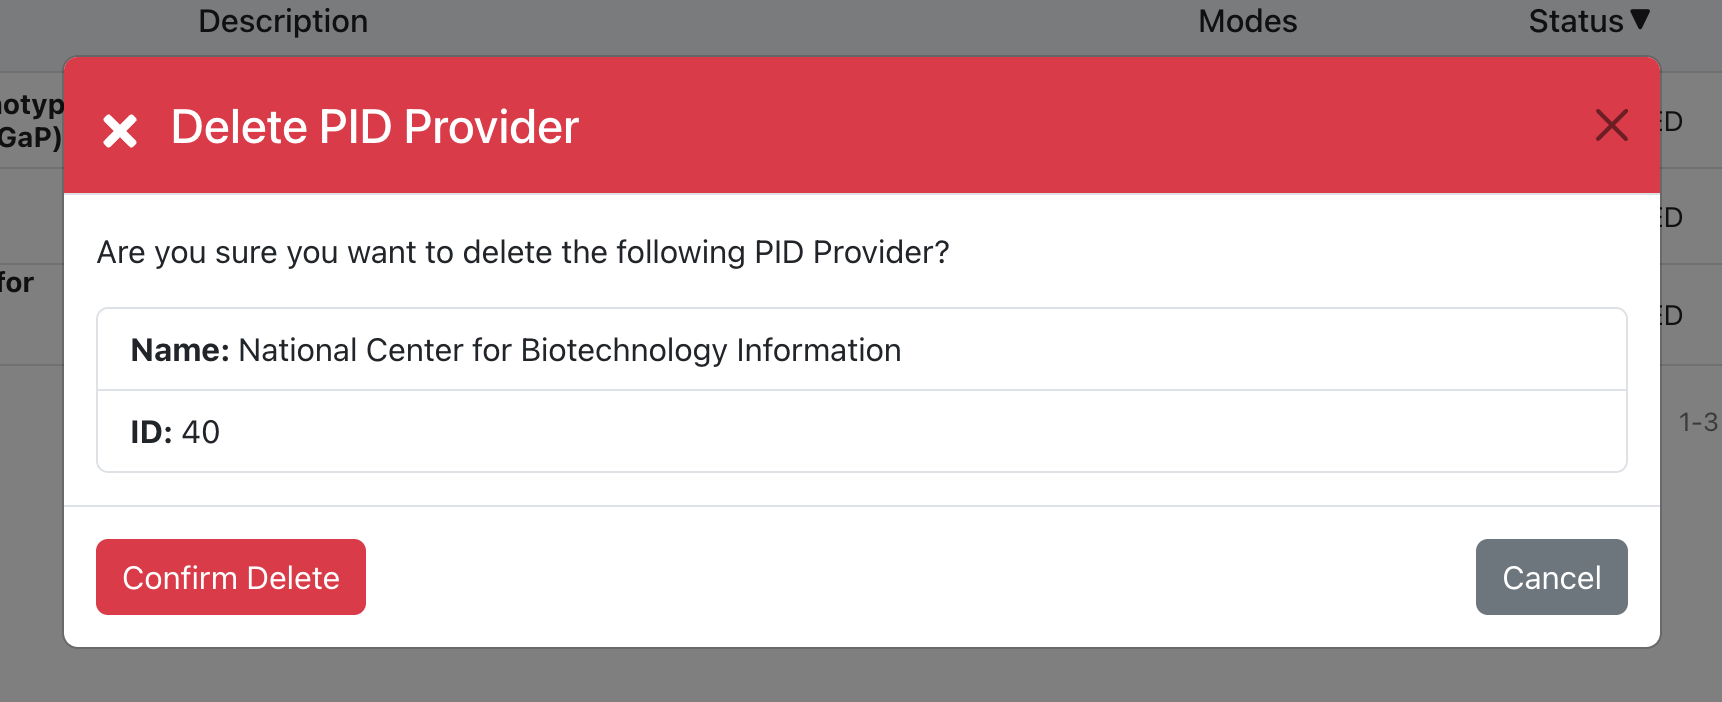
The user can click the Confirm Delete button to delete the entry and then he will be redirected in the page with the list of entries he owns. If the user wishes to cancel the process, then he should click the Cancel button.
Change Status
A User can update the status of one of the entries he owns by clicking on the Update Status button. Then a modal like the one in the following image will appear.
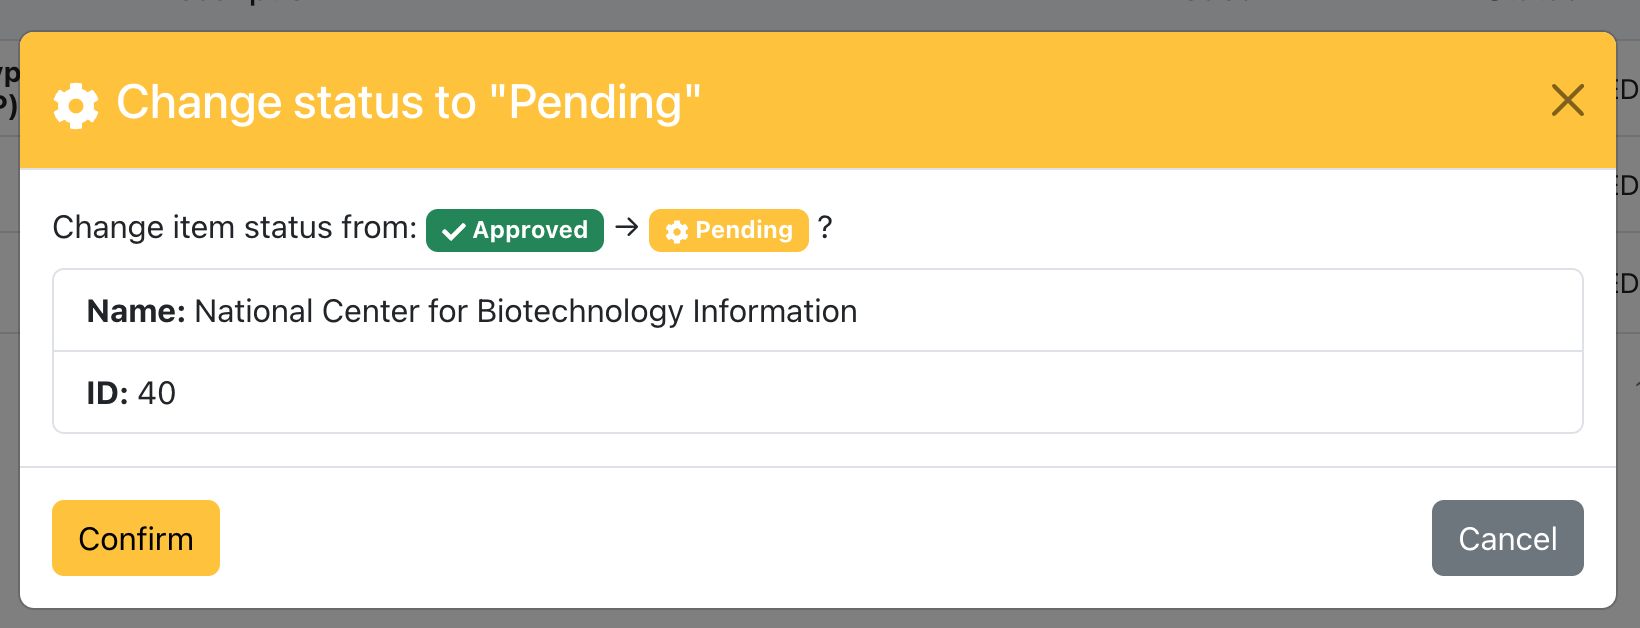
The user can click the Confirm button to change the status of the entry and then he will be redirected in the page with the list of entries he owns. If the user wishes to cancel the process, then he should click the Cancel button.
The status changes from Pending to Approvded and from Approved to Pending. In each change a super admin should check the the update to validate that everything is working smoothly.